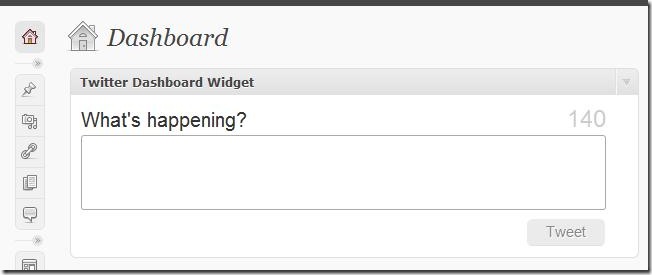
 This simple trick will help you create your own WordPress Dashboard Widget that will enable you to publish tweets to your Twitter account. Bonus: You can tweet with your own Twitter client personalized to your website name!
We will use the STC plugin and then add some of our code to create a WordPress Dashboard Widget. Here’s all that you need to do.
Steps to Create Your Twitter Client
1. Download and Install the Simple Twitter Connect plugin. This is an excellent Twitter Connect plugin by Otto which provides a number of twitter modules to integrate with your WordPress blog. Activate the plugin and also activate the STC – Publish module. Go to plugin settings page for the plugin provide application settings. You need to create twitter app for your Twitter client and it takes only a minute to get one. Steps for this are well described on the settings page itself.
2. Go to WordPress Theme Editor and open your theme’s functions.php file for editing. Scroll to the very bottom and insert following lines of code.
<?php

function twitter_dashboard_widget_function() {

?>

<div id="stc-publish-buttons">

<div id="stc-manual-tweetbox"></div>

<script type="text/javascript">

twttr.anywhere(function (T) {

T("#stc-manual-tweetbox").tweetBox(<?php echo json_encode($tbox); ?>);

});

</script>

</div>

<?php

}

function add_twitter_dashboard_widget() {

wp_add_dashboard_widget('twitter_dashboard_widget', 'Twitter Dashboard Widget', 'twitter_dashboard_widget_function');

}

add_action('wp_dashboard_setup', 'add_twitter_dashboard_widget' );

?>
3. Save the file by clicking on Update File button and your Twitter client is ready!
Open your WordPress Dashboard and you will find your Twitter Dashboard Widget.

By default, the widget gets placed at the bottom of the dashboard. You can drag and bring it to the top for quick access.
Type in your tweet in the space provided and hit the Tweet button. You will have to provide access to this application by signing in with your Twitter credentials. You can provide a permanent authentication via the Simple Twitter Connect plugin’s settings page so that you won’t have to enter credentials every time.
Go to your twitter profile and check out your tweet. Your tweet will display your own Twitter client name.
